Self improvisation of the PROVA Impreza WRX from HPI.
Although I have not really put the light buckets yet...


 The soldering iron!
 Dean connectors!
 Holding the wires and dean plug in place while soldering...
 Want that set of HPI T-Drift tyres or any other brand of tyres to last alot longer and also perform alot better the moment you use them? Well I found the perfect solution. Gleamed this off the internet though, alot of people swear by this; after every drift session, remove all four tyres and soak them in warm water, at the same time scrub off all excess dirt, dust on the tyres & rims to keep them clean.
 Next comes the carbon upper deck, another essential bit of hop up that any good RC drifter should have. This piece isn't just for show, what is does is act like a car's actual strut bar, linking the top front and back ends together and preventing the body from flexing while drifting, the result is an extremely rigid chassis and very little bodyroll while going sideways = precision.

 1. Get a copy of HOTstuff or any modified car mag, search for ads that feature angel-eye headlamp assembly like above, cut out the headlamp pic.
 2. Affix headlamp onto some scotch tape like this.
 3, Now gently move the headlamp into the original lightbucket area, before pressing down on the tape to seal it in place. There you are! Headlamps with angel-eye lights!
 4. For tail-lamps its even simplier, just grab any red coloured paper (if you can't find any, use red pages from your tuner mag and compensate) - that's what I did *LOL. Do the same as the headlamps and presto! Instant tail-lamps!
 Can't get those highly sort-after decals from your favourite actual track/drift car for your RC? Fret not, here's a simple and relatively easy/cheap way of getting those stickers which you always wanted! Here's what you need!
 Ok, first locate the tuner logos and pictures you want. Cut them out and affix the tape over them like the above picture. This is dependent on size of course!
 Now start pasting all your favourtie tuner brands onto your shell! Presto instant stickers! You're only limited by your creativity! Be bold, go wild with them! Here's my dressed up bashing R34 GT-R shell!

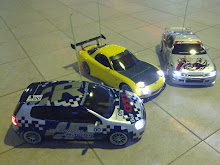
 Well, here's my two cars, ok, one chassis, two shells...
 Here's what you need to make your own exhaust tip for your chassis!
  Right, now put the shell back on and adjust accordingly, so that the tip will not rub against the shell during motion, You have to use a little imagination here and tape the tip to the correct position. That's why I recommend duct tape, because its stretchable and won't lose it's stickiness overtime - perfect for moving the tip into place.
 There you have it! Your very-own exhaust tip! Angle it a little to the side for that Fujitsubo-look!


